
To quote the original CMI II user manual: Page 6 is a close-up display of the actual digital waveform of the voice in the CMI's memory. Electronically derived sounds and naturally derived (sampled) sounds can both have their waveforms displayed and re-drawn. You can fill the voice with analogue waveforms (e.g. Sine, Triangle) or modify the existing data with tools such as copy, add, rotate, transfer and so on.
The voice detail page has a button "Waveform" that will load Page 6. As well as this, the iPhone Page 1 and iPad landscape page 1 have a "P6: Waveform" button that will load Page 6 if a voice has previously been selected. It also has the option of creating a new voice before loading Page 6.
When creating a new voice, you can choose a number of parameters for the voice. If you're not sure what to enter, load another voice similar to what you want in the voice detail page (not Page 6), and look at its parameters. Pay particular attention to the number of samples per segment and the sample rate.
Title: Enter a memorable title for this voice. You won't be able to save the new voice until you enter a title.
Sample rate: The original CMI II had a fixed sample rate of 14,080 Hz. The CMI App allows other rates. When you select a rate, the number of samples per segment will be adjusted so that waveforms that transition at segment boundaries will play at the correct pitch.
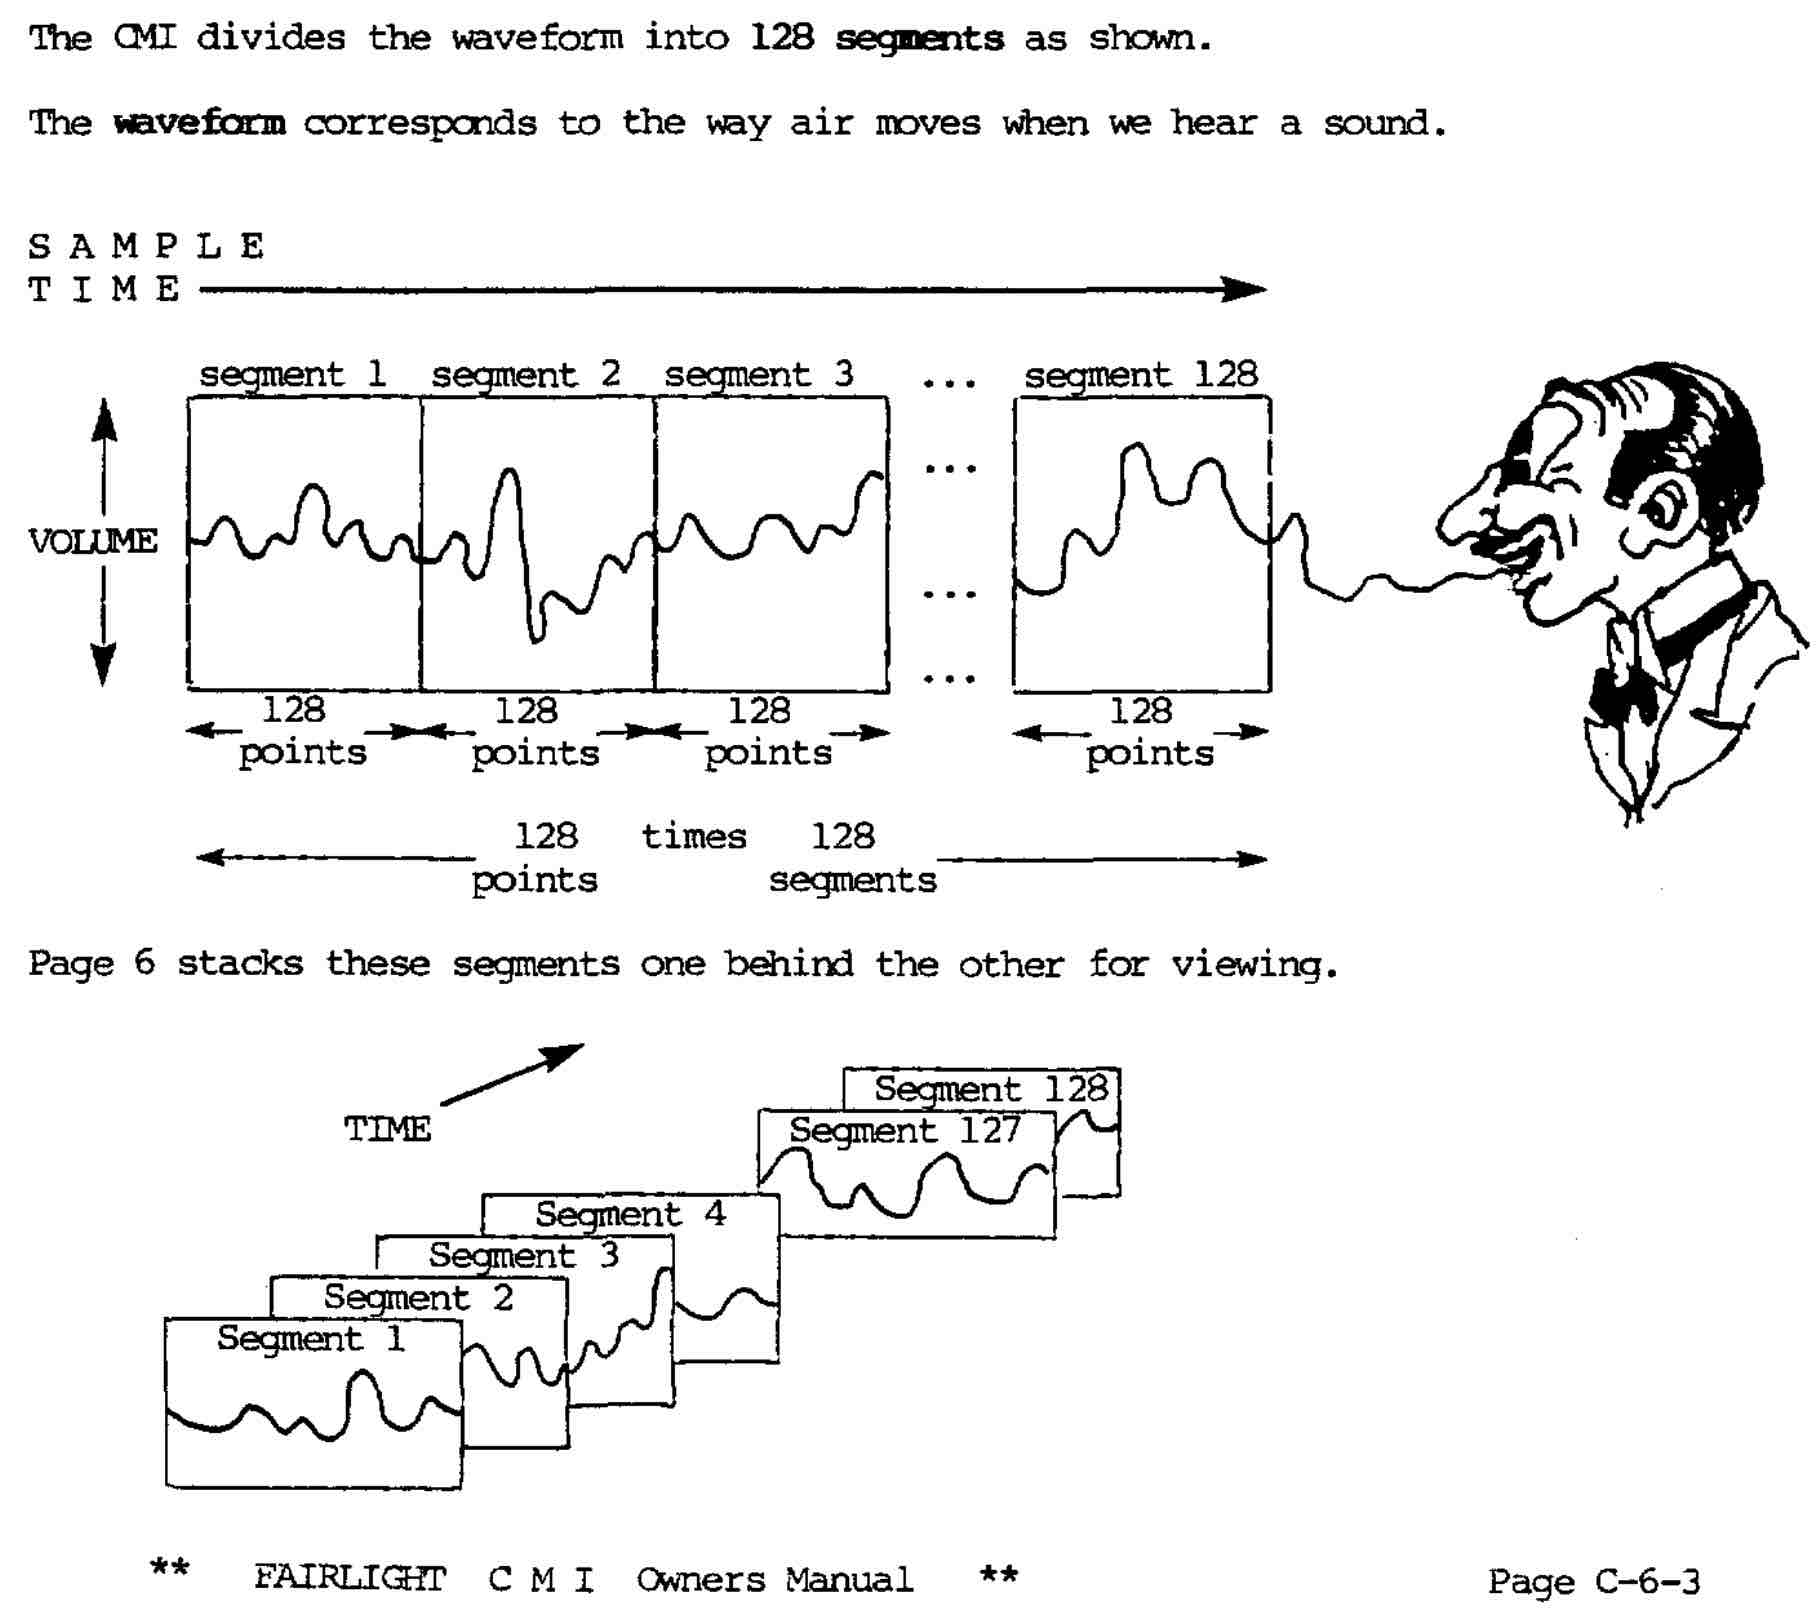
Segments: All CMI songs are divided into segments, with one (or 2, 3 or 4) cycle of the waveform per segment. The number of segments determines the length of the voice.
Cycles per segment: for higher-pitched samples, it may be convenient to sample more than one cycle of the waveform per segment. This setting affects the playback sample rate when a key is pressed, and also is used when generating waveforms such as sine and triangle waves. You can edit this later in the voice detail screen.
Samples/segment: Together with the sample rate, this determines the pitch at which the voice will play. As an example, at the original CMI II settings of 128 samples per segment and 14,080 Hz sample rate, the voice will play at the same pitch as the keyboard key. This is set when you select a sample rate, but if you change it, the voice will not play on pitch unless you adjust it in an Instrument.
Bits per sample: for the crunchy sound of the original CMI, 8-bit audio (definitely lo-fi) will give the most authentic results. Set it to 16 bits to give CMI III quality.
The bottom of the screen displays the waveform of the entire voice, as saved and as it plays when using the music keyboard. Tap on it to select the segment you want to display. Drag left or right on the overall waveform to select a range of segments.
The top waveform display shows the segments that are selected. If more than one segment is selected, grey lines show the segment boundaries. The waveform is displayed as green if it matches the saved waveform, or orange if it has been edited. Use the text fields and +/- buttons at the bottom right to select the range of segments selected. Hold down a +/- button to repeatedly change the selected segment(s). Note that changing the selected segments, or even tapping the +/- buttons, will discard any edited content in the display and replace it with the saved data from the selected segments.
The fill function saves the displayed data into the selected destination segment(s). If the saved and displayed segment numbers are the same, it will overwrite them. If they are different, the displayed data (edited or not) will overwrite the selected destination segment(s). If the destination is shorter than the displayed segments, the smaller number of segments will be written. If the destination is longer, the source segment(s) will be repeated as required to fill the destination.
The two fields at the top right allow you to set the range of segments that will be written with the Fill command. Whenever you select segments for display, the destination range is automatically set the same, but you can change them later to move the data elsewhere.
The copy function copies the displayed data into a scratchpad, which can be used later in the Add function. This scratchpad is retained while the App is running, so can be used to copy data between voices.
Tap on the top waveform to change a single sample. Drag across it to draw a new waveform. If you draw faster than the device can track, linear interpolation will be used. Draw slowly for most accurate results.
The slider allows you to select a value between 1% and 200%. This value is used as the duty cycle when generating waveforms and as gain when adjusting the gain. If above 99%, the wave generator buttons will be disabled for this invalid value.
The first four buttons fill the displayed waveform with sine, triangle, square or sawtooth waves, one per fundamental. The slider value is used to determine the duty cycle for the triangle and square waves. The gain button (up/down arrow) multiples the displayed waveform by the value of the slider. The "0" buttons clears the display.
If three or more segments are selected, the merge function will keep the first and last segment, but replace all intermediate segments by mixing the first and last segments together proportional to their proximity. This allows a gradual change of timbre over a number of segments. If the first and last segments have the same waveform (eg if you copied the first into the last) then the merge function fills all the displayed segments with the same waveform.
If two or more segments are selected, the RoL and RoR buttons will shift all segments by one, moving the pushed-out segment into the newly vacant segment.
The reverse function reverses the timing of all displayed samples, moving the first sample to the last and the last to the first. The invert function inverts the value of each sample, thus changing the phase of a fundamental by 180 degrees.
This function adds the copied scratchpad data to the displayed waveform. If there is a difference in length between the source and destination, the shortest length will be used. Although the Add function fixes differences between 8-bit and 16-bit samples, it doesn't adjust for different segment lengths, so adding data from a voice with a different segment length will give odd results. Note that the Add arithmetic is hard limited at the extremes, so make sure you reduce the gain before adding if required to avoid clipping.
This fills the display with white noise.
This command is used to squash or stretch the waveform in time. Watch this space!
This command is used to make loops from voices that don't naturally have a clean looping point. Watch this space!